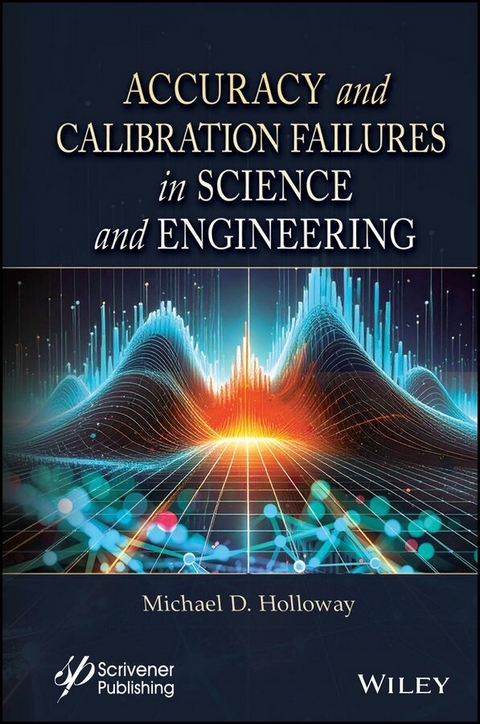
Accuracy and Calibration Failures in Science and Engineering (eBook)
433 Seiten
Wiley-Scrivener (Verlag)
978-1-394-41703-2 (ISBN)
Safeguard your operational integrity and data reliability with this essential technical and investigative guide, which critically examines and provides actionable frameworks to combat the dangerously undercommunicated risks of calibration drift and systemic measurement failures across all industries.
As industries grow more complex and digitized, the demand for precision and reproducibility has escalated, placing extraordinary reliance on sensors, analytical instruments, and automated data systems. This evolution has exposed systemic vulnerabilities such as outdated calibration protocols, unvalidated assumptions, and fragmented oversight across lifecycle stages. This book is a technical and investigative work that critically examines the overlooked, misunderstood, and dangerously undercommunicated issues of calibration drift, traceability loss, and systemic measurement failures across science, engineering, and industry. The book provides a structured, in-depth exploration of how calibration standards shift without timely notification and the cascading consequences this can have on data reliability, regulatory compliance, safety, and decision-making. The content spans from foundational concepts in calibration and metrology to detailed technical analyses of failure modes in sensors, instruments, and analytical systems. The book emphasizes the interconnectedness of human factors, systemic inertia, and institutional resistance to change, delivering actionable frameworks for building resilience, including updated ISO standards, failure mode and effects analysis, checklists, dashboards, and protocols.
Michael D. Holloway is President of the 5th Order Industry, which provides training, failure analysis, and designed experiments. He has more than 40 years of experience in the industry, holding 16 professional certifications and one patent. He has authored ten books and contributed to several others. His expertise lies in failure analysis, reliability engineering, and designed experiments for science and engineering.
2
The Shift in a Calibration Standard
Abstract
Traceability ensures measurement accuracy, reliability, and compliance, linking data to recognized standards, crucial in aerospace, pharmaceuticals, and food safety. Calibration verifies instrument accuracy against known standards, and traceability ensures global measurement consistency. Calibration without traceability risks errors and non-compliance. The shift from NIST SRM 2806 to SRM 2806a highlighted calibration challenges, affecting particle size interpretation and cleanliness codes. Consequences included incorrect equipment assessments and warranty disputes. Lessons include communicating calibration changes, normalizing historical data, and training staff on metrological updates. Key standards include ISO 11171 and ISO 4406, integral to calibration and cleanliness code formats.
Keywords: Traceability, calibration, NIST SRM 2806, particle size distribution, ISO cleanliness codes, analytical drift, measurement integrity
Traceability and Calibration
Traceability is essential in science and engineering because it underpins the reliability, reproducibility, and accountability of measurements, materials, and outcomes. At its core, traceability connects a measurement or process back to a recognized reference standard, often maintained by national or international metrology institutes. This link provides verification that the data or process is accurate, ensuring that engineers and scientists can trust the results and confidently make decisions based on them. In research, traceability allows experiments to be replicated under the same conditions, which is fundamental to the scientific method. In engineering, it ensures that systems or products built in different locations or times will perform consistently.
Traceability also plays a crucial role in regulatory and legal compliance. Many industries, such as aerospace, pharmaceuticals, and food safety, require measurements and materials to be traceable to meet stringent standards set by regulatory bodies like the FDA or ISO. In the event of a dispute or audit, documented traceability can provide evidence of due diligence and data integrity. Moreover, traceability is a pillar of quality assurance programs and calibration systems. Instruments and processes must be calibrated and maintained using standards that are traceable through an unbroken chain of comparisons to national standards, which helps minimize measurement drift and error over time.
In failure analysis and root cause investigations, traceability enables professionals to trace back through records of measurements, materials, and procedures to identify what went wrong, thereby supporting continual improvement and preventive actions. Finally, traceability ensures global compatibility and facilitates international trade. Products tested or validated using traceable methods can be accepted across borders, promoting consistency, reducing redundancy, and enabling collaboration in multinational engineering and scientific endeavors. In all these ways, traceability forms the backbone of credible, consistent, and high-integrity work in science and engineering. Calibration and traceability are fundamentally related to measurement accuracy, quality assurance, compliance, and scientific integrity.
Calibration
Calibration is the process of comparing a measurement instrument or system to a known standard to ensure its accuracy. It’s essential in any field where precise and reliable measurements are required, such as manufacturing, pharmaceuticals, environmental monitoring, and laboratory testing.
Traceability
Traceability means that the measurement results can be linked through an unbroken chain of calibrations, each with stated uncertainties, to national or international standards (e.g., NIST in the U.S. or SI units globally). This ensures consistency and comparability of measurements worldwide.
How They are Related:
- Traceability gives calibration its credibility. Without traceability, a calibration cannot be trusted beyond the local context.
- Traceability ensures that calibration results are globally recognized. If you calibrate a pressure sensor in Houston and another in Berlin, traceability ensures they measure identically because both refer to the same standard.
- Calibration without traceability risks errors and non-compliance. In regulated industries (like FDA, ISO 9001, or aerospace), traceable calibration is required to pass audits and maintain certifications.
- Both underpin decision-making. Every quality control chart, lab test, or manufacturing limit relies on the assumption that instruments are calibrated and that those calibrations are traceable.
Calibration Failure
In the early 2000s, NIST Standard Reference Material (SRM) 2806 was used widely to calibrate particle counters. However, over time, SRM 2806 was found to have limitations, particularly in terms of stability, accuracy, and repeatability.
- SRM 2806 was found to be unstable, and there were concerns about its accuracy and repeatability.
- In response, NIST introduced a new version, SRM 2806a, in 2011.
- This newer version had a different particle size distribution, especially for the ISO code boundaries (e.g., 4 µm, 6 µm, and 14 µm).
- Most importantly, SRM 2806a used different calibration techniques and traceability, including changes to how the equivalent spherical diameter was measured (e.g., changes in how edge detection and scattering light were interpreted).
In the early 2000s, NIST Standard Reference Material (SRM) 2806 was widely adopted as a benchmark for calibrating particle counters used in fluid analysis and contamination monitoring. This standard provided a basis for ensuring consistency and comparability of results across different laboratories and instruments. However, over time, SRM 2806 was found to have limitations, particularly in terms of stability, accuracy, and repeatability. These issues raised concerns within the scientific and industrial communities, prompting a reassessment of calibration practices for particle sizing and counting.
In response to these concerns, NIST released an updated version of the standard in 2011, known as SRM 2806a. This revised material featured a significantly different particle size distribution, particularly affecting the ISO cleanliness code boundaries at key micron sizes such as 4 µm, 6 µm, and 14 µm. These shifts had implications for interpreting and comparing particle count data, especially when transitioning from SRM 2806 to SRM 2806a in operational environments.
Beyond changes in particle size distribution, SRM 2806a introduced new calibration methodologies and traceability protocols. One of the most important improvements involved the way particle sizes were measured and defined. The method for determining equivalent spherical diameter was refined, with enhancements in edge detection and light scattering interpretation playing a critical role. These changes led to more robust and reliable calibration standards, supporting greater confidence in particle counter data across a range of applications.
ISO 11171 is the calibration standard for liquid particle counters (LPCs), typically used in lubricants and hydraulic fluid systems. It provides a method to calibrate optical particle counters using test aerosols or fluids and traceable reference materials.
What Went Wrong
- The change in calibration shifted the apparent particle sizes; the same sample would now show different ISO cleanliness codes.
- Many laboratories and users were unaware that the particle count numbers were no longer comparable year-to-year.
- The change was not immediately communicated clearly across all stakeholders, especially users in industrial and field settings.
- As a result, misinterpretation of oil cleanliness data occurred, with some systems appearing cleaner or dirtier than they actually were.
The transition from SRM 2806 to SRM 2806a brought about significant, yet initially underappreciated, consequences in the field of particle counting and oil cleanliness analysis. One of the most critical issues was that the recalibration altered the apparent size of particles. This meant that the same fluid sample analyzed before and after the switch could yield different ISO cleanliness codes, leading to a perceived change in contamination levels despite no actual difference in the sample itself.
Unfortunately, many laboratories, maintenance teams, and end-users were unaware of this shift in calibration standards. As a result, they continued comparing new particle count data to historical trends without realizing the data were no longer directly comparable. This lack of awareness was compounded by insufficient and inconsistent communication from calibration authorities and equipment manufacturers. Industrial users and field technicians, in particular, were often left without the necessary context to interpret the changes accurately.
The outcome was a widespread misinterpretation of oil cleanliness data. Some systems appeared to be significantly cleaner or dirtier than they actually were, leading to inappropriate maintenance actions, skewed trend analyses, and unnecessary concern or misplaced confidence about fluid system conditions. This episode underscored the importance of transparent communication, user education, and traceability whenever fundamental changes are made to metrological standards or calibration practices.
Consequences
- Reliability professionals sometimes make...
| Erscheint lt. Verlag | 25.11.2025 |
|---|---|
| Sprache | englisch |
| Themenwelt | Naturwissenschaften ► Chemie |
| ISBN-10 | 1-394-41703-9 / 1394417039 |
| ISBN-13 | 978-1-394-41703-2 / 9781394417032 |
| Informationen gemäß Produktsicherheitsverordnung (GPSR) | |
| Haben Sie eine Frage zum Produkt? |
Kopierschutz: Adobe-DRM
Adobe-DRM ist ein Kopierschutz, der das eBook vor Mißbrauch schützen soll. Dabei wird das eBook bereits beim Download auf Ihre persönliche Adobe-ID autorisiert. Lesen können Sie das eBook dann nur auf den Geräten, welche ebenfalls auf Ihre Adobe-ID registriert sind.
Details zum Adobe-DRM
Dateiformat: EPUB (Electronic Publication)
EPUB ist ein offener Standard für eBooks und eignet sich besonders zur Darstellung von Belletristik und Sachbüchern. Der Fließtext wird dynamisch an die Display- und Schriftgröße angepasst. Auch für mobile Lesegeräte ist EPUB daher gut geeignet.
Systemvoraussetzungen:
PC/Mac: Mit einem PC oder Mac können Sie dieses eBook lesen. Sie benötigen eine
eReader: Dieses eBook kann mit (fast) allen eBook-Readern gelesen werden. Mit dem amazon-Kindle ist es aber nicht kompatibel.
Smartphone/Tablet: Egal ob Apple oder Android, dieses eBook können Sie lesen. Sie benötigen eine
Geräteliste und zusätzliche Hinweise
Buying eBooks from abroad
For tax law reasons we can sell eBooks just within Germany and Switzerland. Regrettably we cannot fulfill eBook-orders from other countries.
aus dem Bereich


